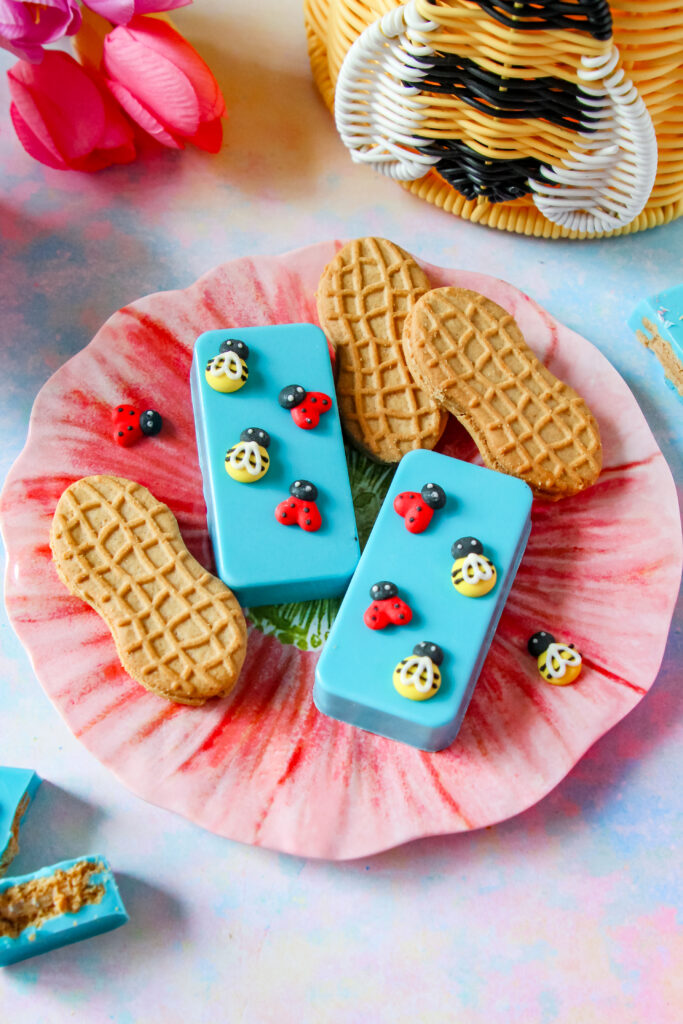
Bees & Bugs Chocolate Covered Cookies
July 1, 2025


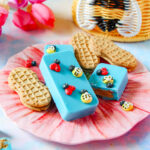
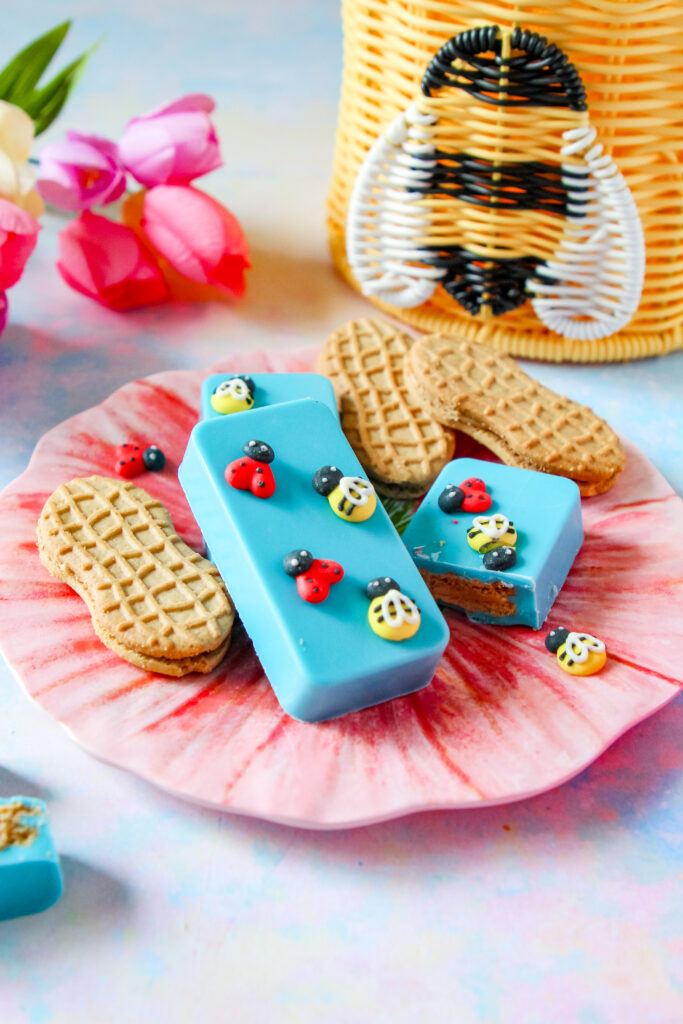
Whimsical White Chocolate-Covered Cookies Topped with Ladybugs and Bees
These Bees & Bugs Chocolate Covered Cookies are cute, fun, and super easy to make. They’ve got a crunchy Nutter Butter center, a blue white chocolate shell, and the sweetest little bees and ladybugs on top. Perfect for spring, parties, or just because—you really can’t go wrong with these.
Why You’ll Love This Recipe
- Easy to make with minimal ingredients
- Uses Nutter Butters for a fun twist
- Blue white chocolate makes them pop
- Topped with cute icing bees and ladybugs
- Perfect for spring parties or themed events
- Bees & Bugs Chocolate Covered Cookies look as good as they taste
Ingredient Notes
- Nutter Butter Cookies – These peanut-shaped sandwich cookies hold up well in molds and add a delicious crunch.
- Ghirardelli White Chocolate Melting Wafers (10 oz) – These melt super smoothly and have a rich vanilla flavor. They’re perfect for coating and set up beautifully.
- Blue Chefmaster Candy Color – Use oil-based candy coloring so your chocolate doesn’t seize. Just a few drops go a long way for that bright blue look.
- Bee & Ladybug Icing Decorations – These ready-made icing toppers from Hobby Lobby are an easy way to decorate without piping.
Shop Bees
Shop Ladybugs - Rectangle Sandwich Cookie Mold – This one from Spinning Leaf works perfectly for holding the cookies and getting a clean finish. Shop it here
- Extra white chocolate – Use just a small amount to attach your icing decorations. You can re-melt leftover chocolate from the coating step.
Before You Make
Do I need to use candy coloring or can I use regular food coloring?
Stick with oil-based candy coloring like Chefmaster. Regular food coloring can make the melted chocolate seize and turn grainy.
Can I use a different cookie besides Nutter Butters?
Yes—Vienna Fingers work well since they’re the right shape for the rectangle mold.
How do I keep the chocolate from bubbling or cracking?
Gently tap the mold after filling to release any air bubbles and make sure the chocolate is fully set before removing
Bees & Bugs Chocolate Covered Cookies
Ingredients
- Rectangle Sandwich Cookie Mold (Spinning Leaf Standard Rectangle Mold – on Amazon or Spinning Leaf)
- 1 (10 oz) bag Ghirardelli White Chocolate Melting Wafers
- Blue Chefmaster Candy Color
- Nutter Butter Cookies
- Icing Decorations:
- Bee Icing Decorations
- Ladybug Icing Decorations
- Offset Spatula
- Extra white chocolate for attaching decorations
Instructions
- Place your rectangle mold on a flat surface.
- In a microwave-safe bowl, melt the Ghirardelli white chocolate wafers according to the package directions, stirring every 30 seconds.
- Once melted, add a few drops of blue candy color. Stir until fully blended with no streaks.
- Fill each mold cavity halfway with the blue chocolate.
- Gently press one Nutter Butter into each cavity. Add more melted chocolate over the top until covered. Tap the mold lightly on the counter to remove air bubbles.
- If the cookie floats, gently press it back down. Use an offset spatula to scrape the top flat.
- Chill the mold in the fridge for at least 30 minutes.
- Once set, carefully flip the mold onto a clean surface or cutting board. If needed, use the warmth of your finger to gently press the back of each cavity to release the cookies.
- Melt a small amount of white chocolate and use it as “glue” to attach 2 bees and 2 ladybugs to each cookie.
- Let the decorations set, then serve at room temperature.
FAQ
Can I make Bees & Bugs Chocolate Covered Cookies ahead of time?
Yes! They stay fresh for up to 5 days at room temperature in an airtight container.
Do I have to use a mold?
The mold helps give a clean, professional look. Without it, the chocolate coating won’t hold the same shape.
Can I use chocolate chips instead of melting wafers?
You can, but chocolate chips don’t melt as smoothly or set as firmly. Ghirardelli melting wafers are a better option for coating.
How do I attach the icing bees and ladybugs?
Melt a small amount of white chocolate and use it as glue. Let them set completely before moving or serving.
Can these be made nut-free?
Yes—just use a nut-free rectangular cookie like Vienna Fingers instead of Nutter Butters.
Sprinkle of Fun
These make the cutest favors for a mini garden party! Pack each Bees & Bugs Chocolate Covered Cookie in a clear treat bag with a little green paper “grass” and a flower sticker seal. Set them out in a basket or mini planter box so guests can “pick” their cookie from the garden on their way out.
get access to my weekly recipe updates!