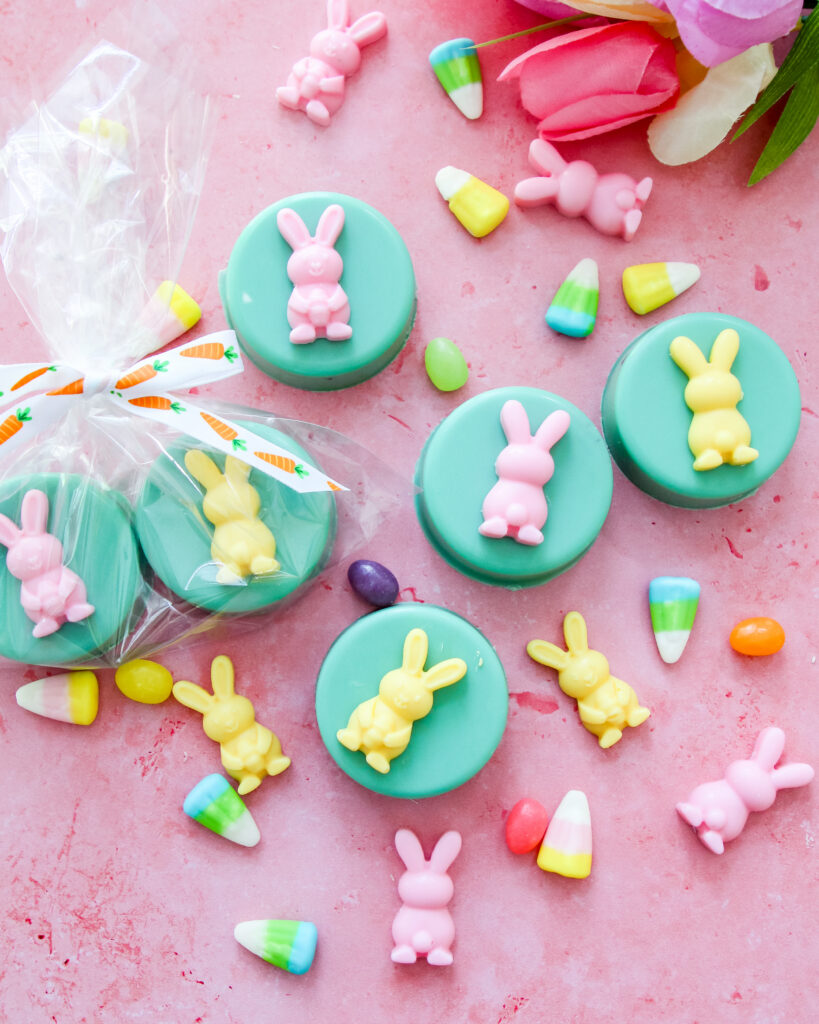
Easter Bunny Chocolate Covered Oreos
April 2, 2026


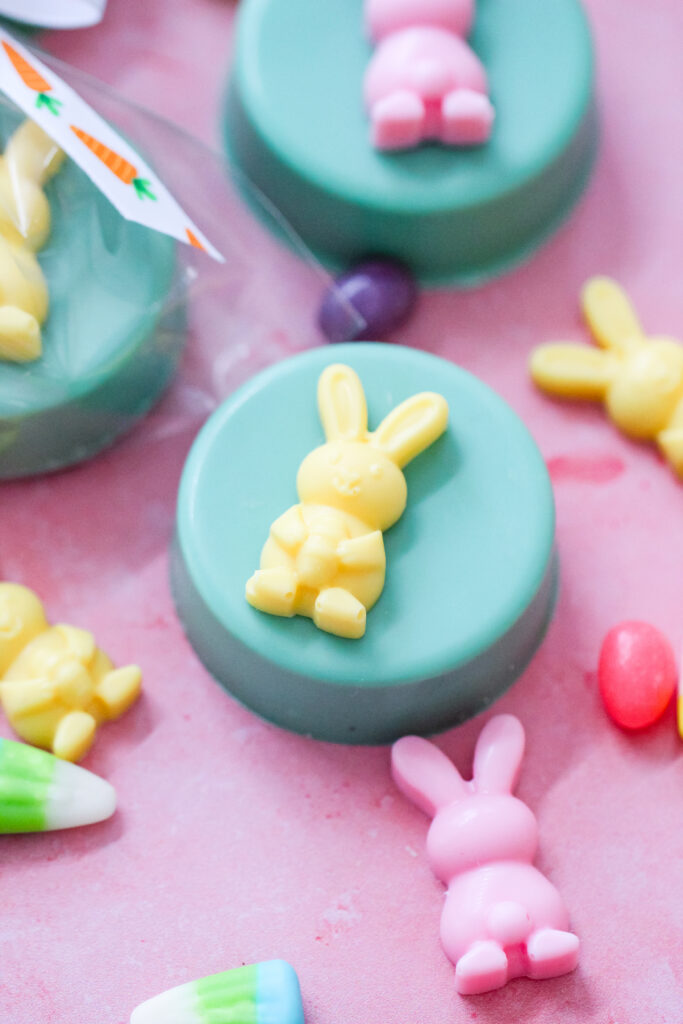
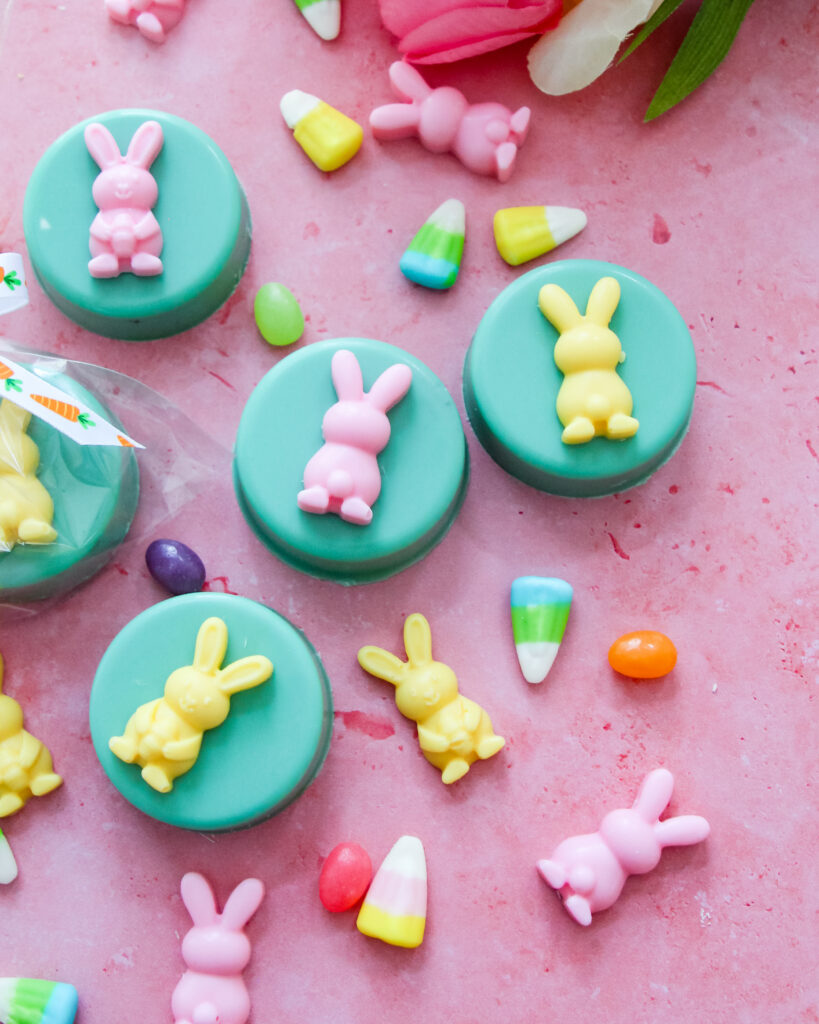
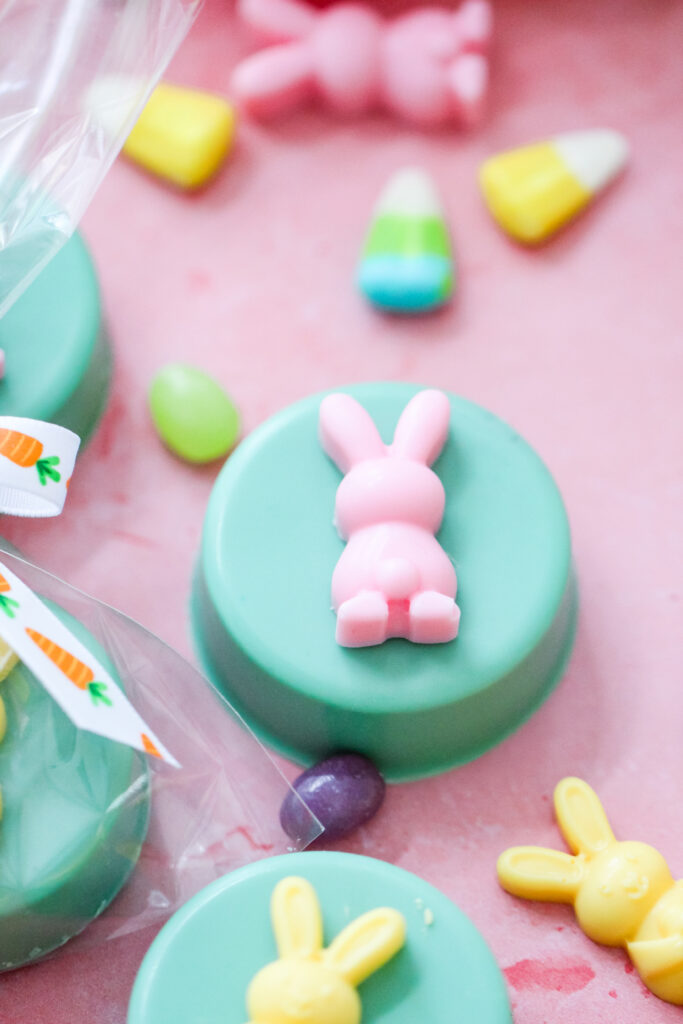
Chocolate-covered Oreos topped with pastel bunny chocolates for a bright Hoppy Easter treat!
These Easter Bunny Chocolate Covered Oreos make the perfect springtime favor. You’ve got chocolate-covered Oreos with a pastel shell, topped with the cutest little bunny for that extra detail that pulls everything together. Tie them up with carrot ribbon and they’re instantly gift-ready.
Flavor Profile
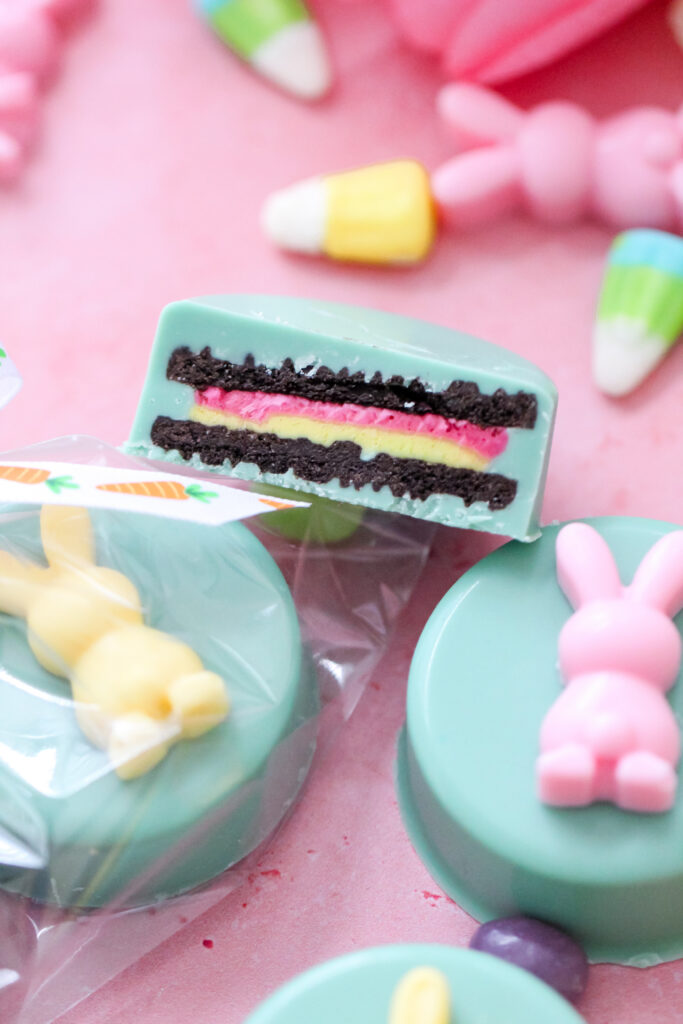
These are rich and creamy with that classic cookies-and-cream center. The white chocolate adds a smooth vanilla sweetness that pairs perfectly with the Oreo, and since everything is coated, each bite has that soft snap from the chocolate shell before you hit the cookie.
Why You’ll Love This Recipe
- No baking required, just melting and assembling with simple ingredients.
- Bright pastel colors make them stand out on Easter dessert tables and gift bags.
- The Oreo center keeps the flavor fun and kid-friendly.
- Perfect for packaging and sharing.
- Easy to customize with different colors, bunny shapes, or seasonal Oreos.
The Twist
The twist is the spring Oreo center. That pink and yellow cream shows through once you bite in, adding a soft pop of color that instantly makes these feel more seasonal.
Ingredient Highlights
- White chocolate melts: Smooth texture and easy melting make them ideal for coating and molding.
- Easter Oreos: Adds a seasonal touch while keeping the center classic.
- Oil-based food coloring: Keeps the chocolate silky while creating soft pastel shades.
- Extra white chocolate: Used for molding the bunny shapes and attaching them to the cookies.
Easter Bunny Chocolate Covered Oreos
Ingredients
Instructions
- Melt the white chocolate according to package directions. Tint it teal or light blue using oil-based food coloring.
- Spoon chocolate into each Oreo mold, filling about halfway. Place one Oreo into each cavity, then gently press it down. Tap the mold lightly to remove air bubbles. Cover with more chocolate until filled to the top and tap again.
- Transfer to the fridge and let set for at least 30 minutes.
- Melt about 1/4 bag of additional white chocolate. Divide and tint half yellow and half pink. Pour into the bunny mold and refrigerate for about 30 minutes, or until fully set.
- Once everything is firm, carefully remove the chocolate Oreos and bunny shapes from the molds.
- Using a small amount of melted white chocolate, attach one bunny to the top of each Oreo. Mix colors and shapes to keep each one a little different.
- Let them set completely.
- Place two cookies into each treat bag and tie with carrot ribbon for a bright, spring-ready finish.
FAQ
Can I use regular Oreos instead of Easter Oreos?
Yes, regular Oreos work perfectly and taste the same.
Why do I need oil-based food coloring?
Water-based coloring can ruin melted chocolate, so oil-based keeps everything smooth.
How long do they need to set?
About 30 minutes in the fridge for each layer is usually enough.
Can I skip the bunny toppers?
You can, but that’s what gives these their signature Easter look.
How should I store them?
Store in an airtight container at room temperature or refrigerate if your kitchen is warm.
Sprinkle of Fun
Add these to Easter baskets for a fun little homemade upgrade, courtesy of the Easter bunny.
get access to my weekly recipe updates!